Dramatic Self-Portrait Photography: From Ordinary to Extraordinary
In this post, I’ll share video footage of the process behind this image revealing how you can create stunning, cinematic self-portraits using nothing more than a camera, self-timer, and strategic lighting. These are the techniques I use to transform mundane spaces into magical scenes, craft compelling narratives through imagery, to unlock creative potential—all without an assistant or expensive equipment!
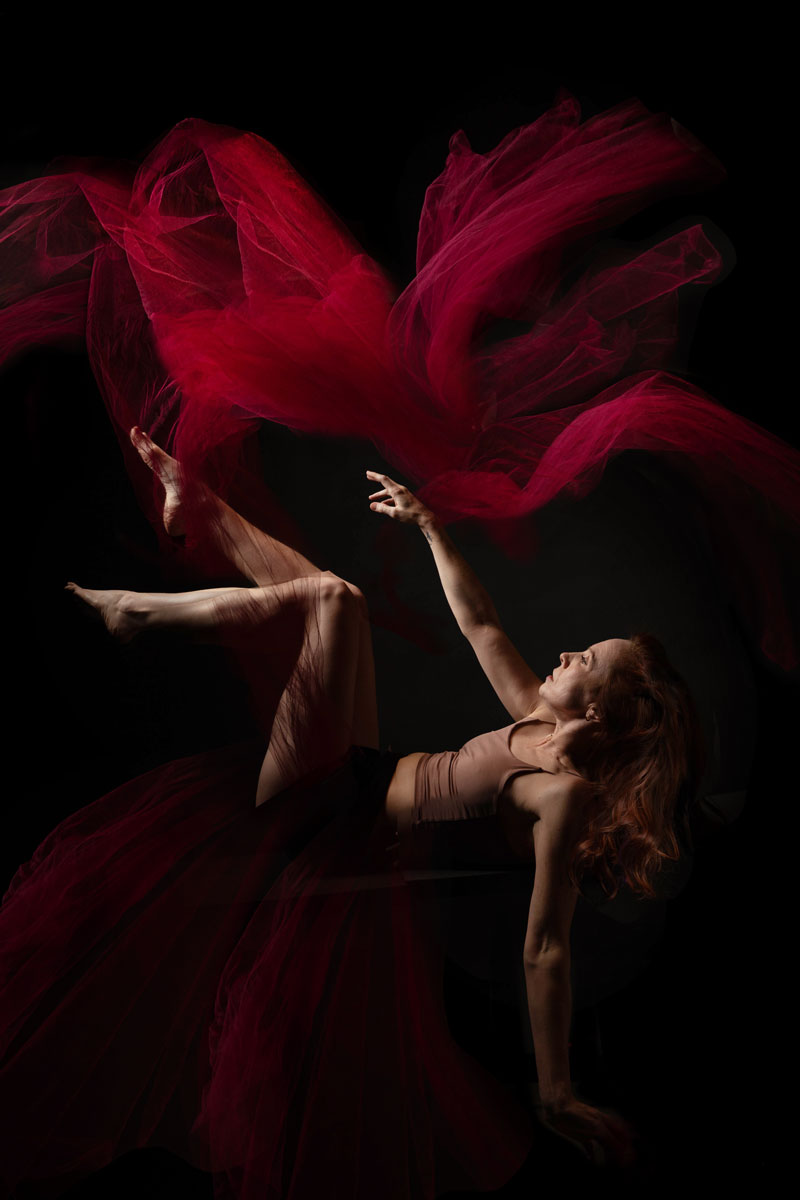
Before shooting, I sketch a rough draft of what I want to achieve but once I start shooting things take on a life of their own. For this shot the most important element was to create the effect of her suspended in space, on the way from a fall. I wanted the arms & legs to appear to have movement. And I never know exactly what I need until I see it in the frame.
For this session, I shot close to 75 frames in an attempt to get the 5-10 photos I’d merge together to create the final work.


For this shoot I used a small softbox to the left and above as my main light. I used a honeycomb grid to further diffuse the light. A second light was placed to the lower right, bouncing off a piece of foam core as a soft fill.
My camera was set on a tripod and once I was on the table, I used a remote trigger to start the shooting sequence. In this scene, I have it set to shoot 5 frames with 2 seconds in between which gave me a chance to throw the fabric and freeze it with the strobe. (Here’s a link to my Amazon list of gear.)
After shooting, I pull the images that have each element I want:
- Fabric lit and flowing to fill the scene
- Legs in the right position to illustrate falling
- hands reaching up & head falling properly
.jpg)
I take multiple frames and blend each element together using my Wacom tablet and Photoshop.
I hope this inspires you to start shooting some dramatic portraits!
.png)
